on
Setting up my GoPiGo
I have been thinking about buying or building some kind of robot for quite a while now to play with different machine learning algorithms in combination with a “body”. As I’m not much of a hardware person, it had to be as easy to assemble and maintain as possible. While researching the options, I came across Dexter Industries’ GoPiGo, a robot kit for the Raspberry Pi. It is aimed towards kids, but still provides enough features to be interesting for more advanced projects as well. Before getting the GoPiGo, I hadn’t even used a Raspberry Pi, so I had to start learning from scratch. This post is a summary of my experiences while setting up the GoPiGo, with basic information that might be useful for others who are starting out without any prior knowledge.
The Specs
I bought the GoPiGo Robot Starter Kit, which includes:
- GoPiGo2 Base Kit (GoPiGo2 board, chassis, wheels, motors, encoders, battery pack)
- Raspberry Pi 2
- Mini Wifi dongle
- GoPiGo servo package
- Ultrasonic sensor
- microSD card
- Power supply
- Ethernet cable
I bought it from Génération Robots to avoid taxes (or rather, having to drive to the tax office…) because I live outside of the US, but in hindsight it would have been better to order it directly from Dexter Industries, as the Starter Kit costs around 230€ shipped by Génération Robots, but for some reason, it doesn’t include the Raspberry Pi like Dexter’s Starter Kit ($209.99 without shipping) does… So all in all I paid around 260€ for the complete Starter Kit, which is still OK in my opinion. The SD card comes with the OS “Raspbian for Robots”, which is Dexter Industries’ own distribution of Raspbian for the RaspberryPi. It already contains lots of code samples in different languages like Python, C++ and Java, and is very nicely done in general.
Making it work
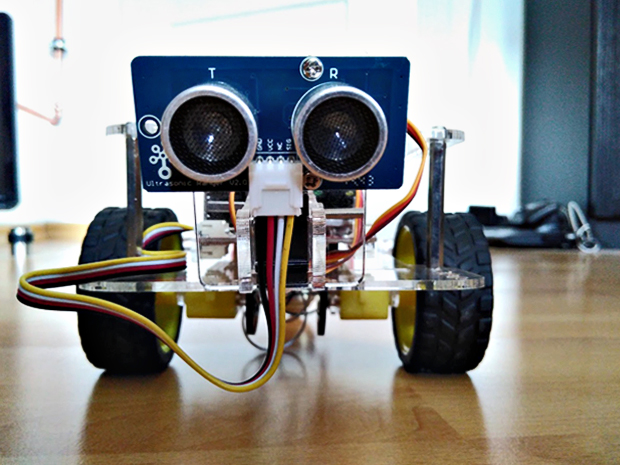
Hardware assembly was very easy just following the guide on Dexter Industries’ website, and only requires a small screwdriver. I only encountered one small issue while attaching the ultrasonic sensor to the chassis. There is a small plastic part that comes with two holes for screws, which you have to widen with the screws yourself by screwing them in. It was quite hard and I’m not sure how kids would do this by themselves, but maybe they have an easier time holding the tiny screws with their tiny hands and putting them into a tiny plastic part… The end of the story is that the GoPiGo’s “head” is a little wobbly, although that could probably be fixed somehow (but not with clear tape, I tried that).
After assembling the hardware, the next step is setting up a network connection. While doing this, I ran into some problems with the SD card and Raspberry Pi. The Pi itself has no off button, and technically the right way to turn it off is running a command along the lines of
sudo shutdown -h nowIf you don’t do this, the SD card which is running the Pi’s OS might be corrupted. This is something that Dexter’s tutorial doesn’t mention, and as it starts by setting up an Ethernet connection before plugging in even as much as a keyboard, it is not obvious to the inexperienced user.
In my case, the corruption of the SD card meant that I couldn’t re-image it with a newer version of Raspbian, because the computer wouldn’t recognize the SD card’s full size anymore (which seems to be quite a common problem with SD cards in general). The solution was to simply reformat the card and re-image it afterwards, which was a pretty tedious process because I had to repeat this every time that I needed to change a config file of the OS and try it on the Pi. In hindsight it would have been a lot easier to just connect a keyboard and screen to the RaspeberryPi, and do all necessary configurations there. Here are some useful links for fixing SD corruption problems and re-imaging:
- SDFormatter will restore the original size of the SD card (see also: this tutorial with step-by-step instructions to re-format an SD)
- Win32 Disk Imager to write the OS image onto the SD (Dexter Industries also has a video tutorial on installing Raspbian)
Configuring the network connection
The second and third step in the set-up tutorial are setting up an Ethernet connection and Wifi, respectively. This was where I had most trouble, as the approaches used in the tutorial didn’t work for me at all. (The network scanner didn’t find my network; it is also recommended that you download “Bonjour” so your computer can find the Raspberry Pi - this didn’t work for me either.) In general, I would advise to ditch these two steps completely, and directly start with setting up a Wifi connection throgh editing the config files of Raspbian manually. Even (or especially) for someone without prior knowledge in Linux network-configuration, this will probably be the easiest. It would sure have saved me a lot of time if this approach was mentioned in the tutorial also. Essentially it comes down to editing two Raspbian files to enter your network details. I tried a number of different tutorials until something worked - what is really important is to restart the Pi, maybe even more than once. In my case, I was fiddling with the connection to no avail, then let the GoPiGo sit for over a month because I had other things to do - and when I turned it on the next time, the network connection just magically worked… Here are some tutorials on how to set up Wifi on Raspbian:
- Setting up Wifi on a Raspberry Pi by Oliver Marriott
- How-To: Add WiFi to the Raspberry Pi on Raspberry Pi HQ
- Automatically connect a Raspberry Pi to a Wifi network by Pieter Beulque
Once the Raspberry Pi is connected to the network and you want to access it from your computer, you will be asked for a username and password. Be aware thet the tutorials list numerous different credentials, so if you can’t connect , it might also be that you have the wrong user or password. I had to try a couple of combinations before I found out what the login data on my system was. One can problaby look this up somewhere in Raspbian, but I didn’t dive into it further. Once the Wifi connection is established, it is advised to do a Software update on Raspbian. After that you are finally ready to run code from the command line! Or if you prefer to have a remote desktop connection to your Raspberry Pi, you can also install VNC Viewer.
After the initial set-up problems, everything runs very smoothly. I played around a little with the provided code samples and already had a lot of fun with the GoPiGo. Now I can’t wait to finally get my own projects started!
Discussion and feedback